[Get the best value pump water pressure switch on Amazon today!]
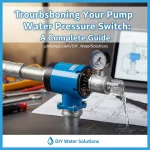
# Troubleshooting Your Pump Water Pressure Switch: A Complete Guide
Is your well water sputtering? Are you experiencing inconsistent water pressure in your home? A faulty pump water pressure switch is often the culprit. Don’t worry, you don’t need to call a plumber just yet! This guide will walk you through troubleshooting your pump water pressure switch, step-by-step, so you can diagnose the problem and, hopefully, fix it yourself.
[Browse top-rated pump water pressure switch on Amazon]
## Understanding Your Pump Water Pressure Switch
Before we dive into troubleshooting, let’s quickly cover what a pump water pressure switch is and what it does. This small but vital component acts as the brain of your well pump system. It monitors the water pressure in your pressure tank and tells the pump when to turn on and off to maintain a consistent water supply. When the pressure drops below a certain point (the “cut-in” pressure), the switch activates the pump. Once the pressure reaches the desired level (the “cut-out” pressure), the switch shuts the pump off. This cycle repeats continuously, ensuring you always have water when you need it. A malfunctioning **pump water pressure switch** can lead to a variety of problems, from low water pressure to a constantly running pump.
[Browse top-rated pump water pressure switch on Amazon]
## Step-by-Step Troubleshooting Guide
Here’s a step-by-step guide to help you troubleshoot your **pump water pressure switch**. Remember to always turn off the power to your well pump before working on any electrical components! Safety first!
### 1. Visual Inspection: Check for Obvious Damage
First, carefully inspect the **pump water pressure switch** itself. Look for any signs of physical damage, such as cracks, leaks, or corrosion. Check the wiring connections to ensure they are secure and not frayed or corroded. Pay close attention to the diaphragm (the rubber bladder inside the switch) – if it’s damaged, the switch will likely need to be replaced.
### 2. Check the Pressure Gauge
Your pressure tank should have a pressure gauge. Check the reading on the gauge. If it reads zero, there’s likely a problem with the gauge itself, or the tank is completely empty (which would indicate a larger issue). Note the pressure reading before proceeding. This will help you determine if the switch is cutting in and out at the correct pressure levels. A healthy pressure gauge is essential for accurately diagnosing **pump water pressure switch** issues.
### 3. Observe the Pump’s Behavior
Listen to your well pump. Is it running constantly, even when you aren’t using any water? Or is it cycling on and off rapidly (short cycling)? Both of these scenarios can indicate a problem with the **pump water pressure switch**.
* **Constant Running:** This could mean the switch isn’t turning off the pump when it reaches the cut-out pressure.
* **Short Cycling:** This often indicates a waterlogged pressure tank or a faulty switch that’s turning the pump on and off too frequently.
### 4. Check for Clogs in the Switch’s Nipple
The **pump water pressure switch** is connected to the water line via a small nipple. This nipple can become clogged with sediment or mineral deposits, preventing the switch from accurately sensing the water pressure.
**How to Clear a Clogged Nipple:**
1. Turn off the power to the pump and shut off the water supply to the pressure tank.
2. Carefully disconnect the switch from the nipple.
3. Use a small wire or pipe cleaner to clear any debris from the nipple.
4. Reinstall the switch and restore power and water.
5. Observe the pump’s behavior to see if the problem is resolved.
### 5. Adjust the Cut-In and Cut-Out Pressure Settings
Most **pump water pressure switches** have adjustable settings for the cut-in and cut-out pressure. These settings are typically adjusted using two nuts located inside the switch housing.
**Important:** Before adjusting any settings, consult the manufacturer’s instructions for your specific switch model. Incorrect settings can damage your pump or pressure tank.
**General Adjustment Procedure:**
1. Turn off the power to the pump.
2. Remove the cover from the switch housing.
3. Locate the two adjustment nuts. The larger nut typically controls the overall pressure range (difference between cut-in and cut-out), while the smaller nut adjusts the cut-in pressure.
4. Make small adjustments to the nuts, turning them clockwise to increase pressure and counterclockwise to decrease pressure.
5. Reinstall the cover and restore power.
6. Monitor the pump’s behavior and the pressure gauge to see if the adjustments have resolved the problem.
7. Repeat the adjustment process as needed until the pump cycles correctly.
### 6. Test the Switch with a Multimeter
If you have a multimeter and are comfortable working with electrical components, you can test the **pump water pressure switch** to see if it’s functioning properly.
**How to Test with a Multimeter:**
1. Turn off the power to the pump.
2. Disconnect the wires from the switch terminals.
3. Set the multimeter to the continuity setting.
4. Connect the multimeter probes to the switch terminals.
5. Manually activate the switch by pressing on the diaphragm.
6. The multimeter should show continuity (a reading of close to zero ohms) when the switch is activated and no continuity (an open circuit) when the switch is deactivated.
7. If the switch doesn’t show the correct continuity readings, it’s likely faulty and needs to be replaced.
### 7. Check the Pressure Tank’s Air Charge
A waterlogged pressure tank can mimic the symptoms of a faulty **pump water pressure switch**. The pressure tank needs a proper air charge to function correctly. Over time, the air charge can leak out, causing the tank to become filled with water.
**How to Check and Adjust the Air Charge:**
1. Turn off the power to the pump and shut off the water supply to the pressure tank.
2. Drain all the water from the tank.
3. Locate the Schrader valve (similar to a tire valve) on the top of the tank.
4. Use a tire pressure gauge to check the air pressure in the tank. The pressure should be 2 PSI below the cut-in pressure of your **pump water pressure switch**. (e.g., if your cut-in pressure is 40 PSI, the air pressure in the tank should be 38 PSI).
5. If the air pressure is too low, use an air compressor to add air to the tank.
6. If the air pressure is too high, release some air from the tank.
7. Close the Schrader valve and refill the tank with water.
8. Restore power and observe the pump’s behavior.
[Browse top-rated pump water pressure switch on Amazon]
## Tools for the Job
Troubleshooting your **pump water pressure switch** requires a few basic tools. Here are a couple of recommendations that will make the job easier:
* **Adjustable Wrench Set:** A good set of adjustable wrenches is essential for disconnecting and reconnecting plumbing fittings. We recommend the [Brand Name] Adjustable Wrench Set because they are durable, comfortable to use, and come in a variety of sizes. The wide jaw opening and precise adjustments make working on plumbing projects a breeze. **Key Features:** Durable construction, comfortable grip, wide jaw opening. *Why we like it:* The quality and versatility of this wrench set make it a worthwhile investment for any homeowner.
* **Multimeter:** A multimeter is a valuable tool for testing electrical components, including your **pump water pressure switch**. The [Brand Name] Multimeter is a reliable and easy-to-use multimeter that’s perfect for DIY projects. **Key Features:** Digital display, multiple measurement ranges, continuity testing. *Why we like it:* It’s accurate, affordable, and simple to operate, making it ideal for beginners.
[Browse top-rated pump water pressure switch on Amazon]
## Pro-Tips / FAQ Section
**Q: My pump is constantly running, even when I’m not using any water. What could be the problem?**
A: Several factors could cause this, including a leak in your plumbing system, a faulty **pump water pressure switch**, or a problem with the well pump itself. Start by checking for leaks and then troubleshoot the switch as described above.
**Q: My pump is cycling on and off rapidly (short cycling). Is this bad?**
A: Yes, short cycling can damage your pump and pressure tank. It’s usually caused by a waterlogged pressure tank or a faulty **pump water pressure switch**. Check the air charge in your pressure tank and troubleshoot the switch.
**Q: How often should I replace my pump water pressure switch?**
A: The lifespan of a **pump water pressure switch** depends on several factors, including water quality, usage frequency, and the quality of the switch itself. A good quality switch can last for 5-10 years or more. However, it’s a good idea to inspect the switch regularly for signs of wear or damage.
**Q: Can I use a different brand of pump water pressure switch than the one that came with my system?**
A: Yes, you can use a different brand as long as the switch has the same voltage, amperage, and pressure settings as your original switch. Consult the manufacturer’s specifications to ensure compatibility.
[Browse top-rated pump water pressure switch on Amazon]
## Encouraging Conclusion
Troubleshooting your **pump water pressure switch** might seem daunting at first, but by following these steps, you can often diagnose and fix the problem yourself. Remember to always prioritize safety by turning off the power before working on any electrical components. With a little patience and these troubleshooting tips, you can
[Check the latest prices and deals for pump water pressure switch on Amazon today!]

![Nintendo Switch Steering Wheels: The Ultimate Buyer’s Guide [2026]](https://www.bestlightweightcameras.com/wp-content/uploads/2026/05/nintendo-switch-steering-wheels-the-ultimate-buyers-guide-2026-150x150.webp)