
[Get the best value fan switch replacement on Amazon today!]
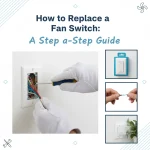
# How to Replace a Fan Switch: A Step-by-Step Guide
Replacing a faulty fan switch might seem daunting, but trust me, it’s a surprisingly simple DIY project you can tackle in an afternoon. This step-by-step guide will walk you through the entire fan switch replacement process, from identifying the problem to enjoying your newly functioning fan. No need to call an electrician – you’ve got this! We’ll make sure you understand every step so you can confidently complete your fan switch replacement.
[Browse top-rated fan switch replacement on Amazon]
## Step-by-Step Guide to Fan Switch Replacement
This guide will break down the fan switch replacement process into manageable steps. Safety first! Always turn off the power before starting any electrical work.
### Step 1: Turn Off the Power
This is the most important step! Locate the circuit breaker that controls the fan you’ll be working on and switch it to the “off” position. Double-check that the fan is indeed off by trying to turn it on. This ensures you’re working in a safe environment and prevents electrical shock.
### Step 2: Remove the Fan Canopy
The fan canopy is the decorative cover that sits flush against the ceiling, concealing the wiring. Typically, it’s held in place by a few screws or a twist-lock mechanism.
* **For Screw-Type Canopies:** Locate the screws around the perimeter of the canopy and carefully unscrew them. Support the canopy as you remove the last screw to prevent it from falling.
* **For Twist-Lock Canopies:** Gently push the canopy up towards the ceiling and twist it counterclockwise. It should detach easily. If it doesn’t, don’t force it; check for any hidden screws or clips.
Once the canopy is loose, gently slide it down the downrod (the metal pipe connecting the fan to the ceiling) to expose the wiring inside.
### Step 3: Identify and Test the Wires
Now you’ll see a mess of wires inside the canopy. Before disconnecting anything, it’s crucial to identify each wire and its function.
* **Black Wire (Hot):** This carries the electrical current.
* **White Wire (Neutral):** This completes the circuit.
* **Green or Bare Copper Wire (Ground):** This provides a safety path for electricity in case of a fault.
* **Colored Wires (Fan Speeds):** These control the different speeds of the fan. Typically, there will be one wire for each speed (e.g., blue for high, gray for medium, white for low).
Use a non-contact voltage tester to ensure that the power is indeed off. Hold the tester near each wire – if the tester lights up or beeps, it indicates that the wire is still live. If that happens, re-check the breaker!
Even with the breaker off, it’s a good idea to take a photo of the wiring configuration before disconnecting anything. This will serve as a valuable reference when you’re reconnecting the new fan switch.
### Step 4: Disconnect the Old Fan Switch
Now that you’ve identified the wires and confirmed the power is off, you can disconnect the old fan switch.
* **Loosen the Wire Connectors:** The wires are usually connected to the fan switch using wire connectors (also known as wire nuts). These are small, plastic caps that twist onto the wires to create a secure connection. Untwist the wire connectors to separate the wires from the old fan switch.
* **Remove the Old Fan Switch:** The fan switch is usually held in place by screws or clips. Remove these to detach the old switch from the fan housing.
* **Inspect the Wires:** Examine the ends of the wires for any damage, such as frayed strands or corrosion. If necessary, use wire strippers to trim the ends of the wires and expose fresh copper.
### Step 5: Connect the New Fan Switch
With the old fan switch removed, it’s time to connect the new one. Refer to the photo you took earlier (or the wiring diagram that came with the new fan switch) to ensure you connect the wires correctly.
* **Connect the Wires:** Match the wires from the new fan switch to the corresponding wires in the fan housing. Twist the wires together securely, then twist on the wire connectors until they are snug. Gently tug on the wires to make sure they are securely connected.
* **Secure the New Fan Switch:** Attach the new fan switch to the fan housing using the screws or clips that held the old switch in place.
### Step 6: Reassemble the Fan
Now that the new fan switch is installed, it’s time to reassemble the fan.
* **Tuck the Wires:** Carefully tuck the wires back into the canopy, making sure they are not pinched or strained.
* **Reattach the Canopy:** Slide the canopy up the downrod and secure it in place using the screws or twist-lock mechanism.
* **Double-Check Everything:** Before turning the power back on, double-check that all the wires are securely connected and that the canopy is properly attached.
### Step 7: Restore Power and Test the Fan
Finally, it’s time to restore power to the fan and test your work.
* **Turn on the Breaker:** Go back to the circuit breaker and switch it to the “on” position.
* **Test the Fan:** Use the fan’s pull chain or remote control to turn it on and test all the speeds. If the fan doesn’t work, or if it makes unusual noises, turn off the power immediately and double-check your wiring connections.
Congratulations! You’ve successfully completed your fan switch replacement.
[Browse top-rated fan switch replacement on Amazon]
## Tools for the Job
Having the right tools makes the fan switch replacement process much smoother and safer. Here are a few essential items:
* **Non-Contact Voltage Tester:** This is crucial for verifying that the power is off before you start working. A reliable option is the Klein Tools NCVT-3. Its durable construction and clear indicator lights make it a safe and easy-to-use tool for any homeowner.
* **Wire Strippers:** These are used to strip the insulation from the ends of the wires, exposing the copper. A good set of wire strippers, like the Irwin Tools VISE-GRIP Wire Stripper, will make this task quick and easy without damaging the wires. Key Features include adjustable wire gauges for different wire sizes, and a comfortable grip for extended use.
* **Why We Like It:** The Irwin Tools VISE-GRIP Wire Stripper is durable, easy to use, and provides clean, consistent wire stripping, making your fan switch replacement project much easier.
[Browse top-rated fan switch replacement on Amazon]
## Pro-Tips / FAQ Section
Here are some common questions and helpful tips to keep in mind:
* **What if the new fan switch doesn’t have the same number of wires as the old one?** Consult the wiring diagram that came with the new fan switch. It should provide instructions on how to connect the wires properly. If you’re still unsure, consult a qualified electrician.
* **Can I use any fan switch as a replacement?** No. Make sure the new fan switch is rated for the voltage and amperage of your fan. Using the wrong switch can be a fire hazard.
* **What if the wires are too short to connect to the new fan switch?** You can use wire extensions to lengthen the wires. Make sure the wire extensions are the same gauge as the existing wires.
* **What if I can’t find the right breaker?** If you’re unsure which breaker controls the fan, you can try turning off breakers one at a time until the fan turns off.
* **Pro-Tip:** Before starting, take pictures of EVERYTHING. This will help you remember how things were connected before you started taking them apart. It’s a lifesaver!
[Browse top-rated fan switch replacement on Amazon]
## Encouraging Conclusion
Replacing a fan switch is a manageable task for any homeowner with a little patience and the right tools. By following these simple steps, you can save money on electrician fees and enjoy the satisfaction of doing it yourself. Remember to always prioritize safety by turning off the power and double-checking your work. Now go forth and conquer that faulty fan switch! You’ve got this!
[Check the latest prices and deals for fan switch replacement on Amazon today!]


![Up Down Switch: What is it and How Does it Work? [2026]](https://www.bestlightweightcameras.com/wp-content/uploads/2026/04/up-down-switch-what-is-it-and-how-does-it-work-2026-150x150.webp)
![Where to Buy 2nd Hand Switch Games: The Ultimate Guide [2026]](https://www.bestlightweightcameras.com/wp-content/uploads/2026/04/where-to-buy-2nd-hand-switch-games-the-ultimate-guide-2026-150x150.webp)