1")
[Get the best value range hood light switch replacement dimmer on Amazon today!]
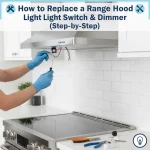
# How to Replace a Range Hood Light Switch & Dimmer (Step-by-Step)
Is your range hood light switch flickering, completely dead, or just not dimming like it used to? Don’t worry, replacing it is a surprisingly simple DIY project you can tackle in an afternoon! This comprehensive, step-by-step guide will walk you through the entire process of range hood light switch replacement dimmer, even if you’ve never tinkered with electrical wiring before. We’ll cover everything from safety precautions to the tools you’ll need, ensuring a successful and safe repair.
[Browse top-rated range hood light switch replacement dimmer on Amazon]
## Step 1: Safety First! Disconnect the Power
This is the most crucial step. **Never** work on electrical appliances without disconnecting the power source.
1. **Locate the Circuit Breaker:** Find the circuit breaker that controls the range hood. It’s usually labeled “Kitchen,” “Range Hood,” or something similar. If you’re unsure, you can test different breakers by turning them off one by one until the range hood light goes out.
2. **Turn Off the Breaker:** Flip the breaker switch to the “OFF” position. Double-check that the range hood light is off and that the fan is not running to confirm the power is completely disconnected.
3. **Verify with a Non-Contact Voltage Tester:** For added safety, use a non-contact voltage tester to verify that there’s no live electricity running to the range hood. Simply hold the tester near the wiring you’ll be working on. If it detects voltage, the tester will light up or beep. If this happens, double-check that you’ve turned off the correct breaker.
[Browse top-rated range hood light switch replacement dimmer on Amazon]
## Step 2: Access the Range Hood’s Wiring
Now that the power is off, you can access the wiring compartment where the light switch and dimmer are located.
1. **Locate the Access Panel:** The access panel is usually located on the underside of the range hood, near the light switch and fan controls. It might be held in place by screws, clips, or a combination of both.
2. **Remove the Access Panel:** Carefully remove the screws or disengage the clips to detach the access panel. Set the panel and screws aside in a safe place so you don’t lose them.
3. **Inspect the Wiring:** Once the panel is removed, you’ll see the wiring connected to the light switch and dimmer. Take a moment to inspect the wiring for any signs of damage, such as frayed wires, loose connections, or burn marks. If you see any damage, it’s essential to address it before proceeding.
[Browse top-rated range hood light switch replacement dimmer on Amazon]
## Step 3: Identify the Old Light Switch and Dimmer
Before disconnecting anything, it’s important to identify the wires connected to the old light switch and dimmer. This will make it much easier to reconnect the new one correctly.
1. **Take a Picture:** Use your phone or camera to take a clear picture of the wiring connections. This will serve as a valuable reference when you’re reconnecting the wires later. Make sure the picture clearly shows the colors of the wires and where they are connected to the switch and dimmer.
2. **Note the Wire Colors:** In addition to taking a picture, make a note of the colors of the wires connected to each terminal on the switch and dimmer. Common wire colors include black, white, green (or bare copper), and sometimes red.
3. **Diagram (Optional):** If you’re comfortable doing so, you can also create a simple diagram showing the wiring connections. This can be especially helpful if the wiring is complex or if you’re concerned about forgetting the connections.
[Browse top-rated range hood light switch replacement dimmer on Amazon]
## Step 4: Disconnect the Old Light Switch and Dimmer
With the wiring identified, you can now disconnect the old light switch and dimmer.
1. **Loosen the Screws:** Use a screwdriver to loosen the screws holding the wires to the terminals on the switch and dimmer. Don’t completely remove the screws yet.
2. **Remove the Wires:** Once the screws are loosened, carefully pull the wires off the terminals. If the wires are stuck, gently wiggle them back and forth while pulling. Avoid pulling too hard, as this could damage the wires or the terminals.
3. **Label the Wires (Optional):** If you’re concerned about confusing the wires later, you can use small pieces of masking tape to label each wire. Write the terminal number or a brief description of the wire’s function on the tape.
4. **Remove the Switch and Dimmer from the Housing:** Most range hood light switches and dimmers are held in place by a nut or retaining clip. Loosen the nut or disengage the clip to remove the switch and dimmer from the range hood housing.
[Browse top-rated range hood light switch replacement dimmer on Amazon]
## Step 5: Install the New Light Switch and Dimmer
With the old switch and dimmer removed, you can now install the new one.
1. **Insert the New Switch and Dimmer:** Insert the new light switch and dimmer into the range hood housing. Secure it in place with the nut or retaining clip.
2. **Reconnect the Wires:** Using your picture, notes, or diagram as a guide, reconnect the wires to the terminals on the new switch and dimmer. Make sure each wire is connected to the correct terminal. Tighten the screws to secure the wires in place.
3. **Double-Check the Connections:** Before proceeding, double-check all the wiring connections to ensure they are secure and correct. Make sure there are no loose wires or exposed bare wires.
[Browse top-rated range hood light switch replacement dimmer on Amazon]
## Step 6: Test the New Light Switch and Dimmer
Before reassembling the range hood, it’s a good idea to test the new light switch and dimmer to make sure they are working properly.
1. **Turn on the Circuit Breaker:** Go back to the circuit breaker panel and flip the breaker switch back to the “ON” position.
2. **Test the Light:** Turn on the range hood light using the new switch. If the light comes on, that’s a good sign.
3. **Test the Dimmer:** If your new switch is a dimmer switch, test the dimmer function by adjusting the brightness of the light. Make sure the dimmer works smoothly and that the light dims properly.
4. **If it Doesn’t Work:** If the light doesn’t come on or the dimmer doesn’t work, immediately turn off the circuit breaker and double-check the wiring connections. Make sure all the wires are connected to the correct terminals and that the screws are tightened securely.
[Browse top-rated range hood light switch replacement dimmer on Amazon]
## Step 7: Reassemble the Range Hood
If the new light switch and dimmer are working properly, you can now reassemble the range hood.
1. **Replace the Access Panel:** Carefully replace the access panel and secure it with the screws or clips.
2. **Double-Check Everything:** Before you’re completely done, give everything one last look to ensure that all wires are tucked away properly, the access panel is securely fastened, and the area is clean.
[Browse top-rated range hood light switch replacement dimmer on Amazon]
## Step 8: Final Test
1. **Turn on the Circuit Breaker:** Go back to the circuit breaker panel and flip the breaker switch back to the “ON” position.
2. **Test the Light:** Turn on the range hood light using the new switch. If the light comes on, that’s a good sign.
3. **Test the Dimmer:** If your new switch is a dimmer switch, test the dimmer function by adjusting the brightness of the light. Make sure the dimmer works smoothly and that the light dims properly.
### Tools for the Job
To make this project easier and safer, here are a few essential tools you’ll need:
* **Screwdriver Set:** A set of screwdrivers with both Phillips and flathead tips is essential for removing screws and tightening terminals. A magnetic screwdriver can be particularly helpful for holding screws in place in tight spaces.
* **Wire Strippers/Cutters:** These tools are used to strip the insulation off the ends of wires and to cut wires to the correct length. Look for a pair that can handle a range of wire gauges.
* **Non-Contact Voltage Tester:** As mentioned earlier, a non-contact voltage tester is a must-have for electrical work. It allows you to safely verify that there’s no live electricity running to the appliance. The Klein Tools NCVT-1 is a popular and reliable option. Its key features include:
* **Audible and Visual Alerts:** Clearly indicates the presence of voltage with both a beeping sound and a bright LED light.
* **Wide Voltage Range:** Detects voltage from 12 to 1000V AC, making it suitable for a variety of electrical applications.
* **Durable Construction:** Built to withstand the rigors of everyday use.
Why we recommend it: The Klein Tools NCVT-1 provides a reliable and safe way to confirm that the power is off before you start working. Its clear alerts and durable construction make it a valuable tool for any DIYer. Using this tool will significantly minimize the risk of electrical shock.
* **Pliers:** Pliers can be useful for gripping and manipulating wires, especially in tight spaces.
* **Flashlight or Headlamp:** Good lighting is essential for any electrical project. A flashlight or headlamp will help you see the wiring clearly.
[Browse top-rated range hood light switch replacement dimmer on Amazon]
## Pro-Tips / FAQ Section
* **My new dimmer switch doesn’t seem to work properly. What could be the problem?**
* Make sure the dimmer switch is compatible with the type of light bulb you’re using. Some dimmer switches are designed for incandescent bulbs only, while
[Check the latest prices and deals for range hood light switch replacement dimmer on Amazon today!]